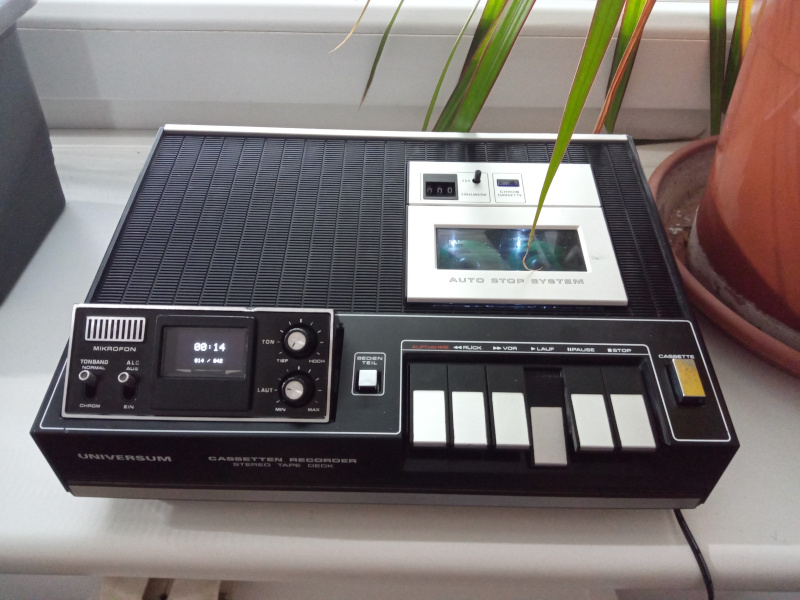
| player.jpg | ||
| README.md | ||
| tapedeck-player.ino | ||
Tapedeck Player
Replace the old electronics of your tapedeck with an mp3 player, all while keeping the retro controls working!
Hardware
- Tapedeck. Anything will do, I used a Universum Cassetten Recorder - Stereo Tape Deck CT 2746 from 1974.
- Arduino
- DFPlayer Mini MP3 Player with an SD card
- OLED Display. I used a 1.3" I2C display, 128x64 pixels, SH1106 controller.
- audio amplifier to drive the speaker
- one microswitch to detect the fast-forward button being pressed
I reused a lot of the original components from the tapedeck (including wires), namely the user-facing electronics: volume and bass/treble potentiometers, mode-select switches, lights, speaker, power-on switch, audio input/output DIN connectors. And of course the tape motor.
How This Works
Everything gets powered when a button on the cassette drive is pressed, activating the motor among other things. After the Arduino and the MP3 player boots (after a few seconds), the OLED display activates and the music starts. When the player is stopped, power is cut and the whole device is truly off.
Every power-on is a fresh boot for the MCU. Therefore it keeps track of what song to play in its EEPROM; whenever a song finishes, the song index is increased and stored.
The Fast-Forward button has a microswitch that tells the MCU to only play a short beginning of each song, skipping through them quickly.
The OLED display shows the song time, song index and the number of songs on the SD card.
The volume potentiometer controls the volume (gain) on the audio amplifier.
The MCU scans the tone potentiometer and changes the equalizer preset on the MP3 player: BASS, NORMAL, POP.
The "chrome cassette" switch overrides the selected equalizer ROCK.
